Monday, November 29, 2010

Chicken Casserole with Biscuits

Everyone should have at least one recipe in their repertoire that requires the absolute minimum of preparation, using ingredients that will probably already be in your fridge, freezer or pantry.  Just for those days when the least amount of effort for a huge and tasty payoff is required.  This one is even cooked in the slow cooker, so even better.

This is mine.....
(By all means, if you have the time or inclination, please, please make your own biscuit dough for the topping, but I'm more than happy with using those tube biscuits - like I said, 'minimum preparation'!! :o)


Chicken Casserole with Biscuits
6 servings

6 skinless, boneless chicken breasts
2 Tbs butter, softened
1 onion, sliced
1 can condensed chicken soup
1 can condensed mushroom soup
1-2 tbs dried garlic (or 1-2 cloves, chopped - but that was just too much effort today :o)
2 Tbs chicken seasoning
pinch salt & pepper
vegetable stock
1 tube refrigerator biscuits

  • in a 4-6 quart slow cooker, combine the chicken breasts, butter, onion, soups, garlic, chicken seasoning and salt and pepper; pour in enough vegetable stock to almost cover the chicken, and mix well.
  • cover and cook on LOW heat for 4 hours.
  • remove the chicken breasts and chop into bite size pieces; return to the slow cooker and mix well, check the seasoning and add more salt and pepper if needed.
  • break each biscuit in half and arrange across the top of the casserole, sinking them into the sauce slightly.
  • turn the heat to HIGH, and cook for a further 1.5 - 2 hours, until the biscuits are puffed up and golden.

 Chicken Casserole with Biscuits ingredients.

this is about the hardest of the prep work that you'll have, apart from opening a few cans ;o)

I just love the concept of throwing everything in the slow cooker and leaving it to do it's own thing - ingenious!

mix everything up well.

I didn't even use a knife to cut the chicken, just the spoon that I was going to mix it back into the sauce with - it's soooo tender.

I always jump at the 'pop' as the tube explodes open - I usually expect them to fly across the room!!

tear the biscuits in half and submerge them slightly in the sauce.  Don't worry if you think the sauce is a little too 'liquidy' at this stage - the biscuits will soak some of that up as they bake.

the biscuits puff together and are wonderfully moist.

if, like today, I wanted as little work as possible I make ours pretty basic, but on occasion I'll add some frozen vegetables (peas, corn, green beans - whatever's handy) just before I put the biscuit topping on and it's delicious that way too.

Sunday, November 28, 2010

Chocolate Chip Meringues

I'm figuring with the holiday season barrelling towards us at a break neck speed, there are about to be copious amounts of scrumptious treats due to be coming out of my kitchen.  Undoubtedly, a good portion of those, although good for our taste buds, they might not be so good for our waistlines - what can I say....Christmas comes but once a year :o)

So, even though I had a hankering to make something chocolatey today, I opted for something low in fat, in the spirit of 'under-indulgence'.....for now anyway!!!


Chocolate Chip Meringues
makes 15-25 cookies (depending on size)

2 egg whites
1/8 tsp cream of tartar
1/3 cup sugar
1 tsp vanilla extract
1 Tbs cocoa powder
1/2 cup chocolate chips

  • preheat the oven to 250 F, and cover two cookies sheets with foil or parchment paper.
  • in a clean metal or glass bowl whisk the egg whites and cream of tartar with a hand or stand mixer, until soft peaks.
  • gradually add in the sugar, while whisking, until the mixture forms stiff peaks.
  • mix in vanilla and cocoa powder on low speed.
  • fold in chocolate chips by hand.
  • drop heaped teaspoon size mounds onto the prepared cookie sheets about 2 inches apart.
  • bake for 1 hour; turn off oven heat and leave the sheets in the oven for another hour.
  • store in an airtight container.

 Chocolate Chip Meringue ingredients.

whisk the egg whites and cream of tartar - it doesn't take long to go from this, frothy, stage to soft peaks.

you can sift the cocoa if you want, but I didn't bother, and they came out fine.

I opted for the foil today, and they peel off pretty easily as long as you go careful.

these are great on their own for a little chocolate 'fix', but they'd also be wonderful popped into the top of a decedent chocolate mousse.

because of the slow, low cooking the chocolate chips keep their shapes pretty well.

    Thursday, November 25, 2010

    Raspberry Crumble Squares

    Today was definitely a day for baking rather than venturing outside - it's been snowing pretty much all day.  Not a huge amount, but enough to cover up the tire tracks from my hubby's car after he went to work early this morning.  With the wood burning stove blazing and the oven on a couple of different times during the day, the house has been toasty warm.  Hopefully my hubby will be home soon so he can enjoy these tasty treats with me.

    We managed to get a large amount of superb, fresh raspberries back in the summer from a local winery, and most of them got divided into Ziploc bags holding 2 cups each, and the rest I made into raspberry jam, which we've been enjoying ever since.  These squares will bring back the memory of summer, even when it's white with snow outside :o)


    Raspberry Crumble Squares
    makes 9 large or 16 small squares

    base and topping
    1 cup all-purpose flour
    1 cup oats
    1/2 cup packed brown sugar
    1/4 tsp baking soda
    1/4 tsp salt
    1/3 cup butter, melted

    filling
    2 cups fresh or frozen (unthawed) raspberries (or any other berries)
    1/2 cup raspberry jam (or other berry jam)
    2 tsp all-purpose flour

    • preheat the oven to 350 F.
    • in a large bowl, combine the flour, oats, brown sugar, baking soda and salt.
    • add the melted butter and mix until you have a crumbly mixture.
    • remove 1 cup and set aside for the topping.
    • press the remaining crumble evenly into an 8" x 8" pan, sprayed with non-stick spray.
    • in a medium bowl stir together the filling ingredients until all the flour is incorporated.
    • spread evenly over the base; sprinkle the reserved crumble over the top.
    • bake for 30-35 minutes, until bubbling around the edges.
    • cool, in the pan, on a wire rack; cut into 16 squares.  Eat as a snack or a dessert, warm served with vanilla ice cream.  Yum!

     Raspberry Crumble Squares ingredients.

    mix the flour, oats, sugar, baking soda and salt until you have a 'crumble' consistency.

    don't forget to spray the pan with non-stick spray before you press in the base.  You don't want all this deliciousness to stick to the pan so that you leave half of it behind!!!

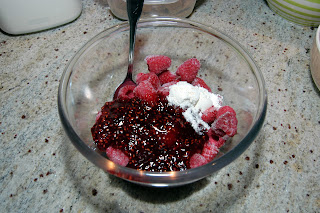
    it doesn't matter if the raspberries are still frozen - as you mix them with the jam and flour they'll start to thaw and break down.

    make sure you spread it right to the edges - you want every bite to be a mouthful of raspberry sweetness.

    sprinkle the remaining crumble on the top - no need to press it down.

    no matter how tempting it is, try to leave the pan alone to cool completely, otherwise instead of firm(ish) squares, you'll just end up with raspberry crumble in a bowl......mmmm, actually there's nothing wrong with that either :o)

    I opted for 9 larger squares today.

    you might notice that there are only eight squares on the plate - the ninth one was that 'all to fragile' first square that you try to get out of the pan without breaking, but never quite manage it, so then it becomes the 'taste test' sample - well, that's my excuse for hubby and I to devour it as we stood over the pan anyway!!! :o)

    we didn't have any vanilla ice (no ice cream at all actually), but frozen cool whip worked quite nicely too.

    Focaccia

    I make my own bread, but today I didn't want to make my usual fairly plain sandwich loaf.  Although it's delicious, and a pretty fail-safe recipe, I just liked the idea of doing something a little different for our sandwiches.  Focaccia is very similar to a pizza dough, just without the toppings, and works beautifully filled with your favourite sandwich fixings.  We actually had some for dinner as a sort of Philly cheesesteak but with leftover meatloaf sliced up inside along with fried onions and provolone cheese melted on the top - it's sounds kind of strange but turned out surprising well.  This recipe originally came from Julie Van Rosendaal's book 'Grazing' - a food bible for anyone who likes 'snack' food (among other things :o)


    Focaccia
    1 'loaf'

    3/4 cup warm water
    1/2 tsp sugar
    1 1/2 tsp active dry yeast
    2 1/4 - 2 1/2 cups flour
    1 tsp salt
    a pinch of black pepper
    1 Tbsp olive oil

    topping
    1 Tbsp olive oil
    2 cloves garlic, crushed
    sprinkling of italian seasoning
    coarse salt

    • Combine the water and sugar in the bowl of a stand mixer; sprinkle with the yeast and let stand until foamy, about 5-10 minutes. (If the yeast doesn't foam, it could mean that either the water was too hot and killed the yeast, or your yeast may be inactive, in which case all you can do I'm afraid is buy new).
    • add 2 cups of the flour, salt, pepper and olive oil, and using the dough hook on your mixer on a low speed, mix until all ingredients are combined and it forms a soft ball - add more of the flour in 1/4 cup increments if the mixture is too moist and is sticking to the bowl.
    • mix / knead for a couple of minutes in the stand mixer, until it's smooth and elastic.
    • transfer the dough to an oiled bowl, turning the ball of dough to cover all over with oil; cover with a tea towel and leave to rise in a warm place until doubled in size - about 45 minutes.
    • pat the dough into a 9" x 10" disc on a baking sheet.
    • poke holes with your fingers all over the top and drizzle with oil, garlic, italian seasoning and salt.
    • cover loosely with plastic wrap and leave to rise for an hour, until doubled in size.
    • preheat the oven to 400 F.
    • bake for 20-30 minutes, until it's golden and sounds hollow when tapped on the bottom.

    Focaccia ingredients.

    let the yeast foam up before adding the other ingredients - this was as it started foaming.

    if you don't have a stand mixer, mixing by hand works fine too.

    turn the ball of dough a couple of times to coat with oil.

    doubled in size.

    press it out into either one large flat bread as this, or divide the dough and make individual serving size breads.

    a simple flat bread that can be used for sandwiches or even torn up to accompany a dip.

    Wednesday, November 24, 2010

    Wholesome Tasty Bean Bake

    I have a wonderful cookbook called For The Breasts of Friends, published by a group of women who have all been affected with cancer.  They collected the recipes from friends and family and over the past couple of years since I bought the book, I've added post-it notes all throughout showing the recipes that I've either already tried or are on my 'to-do' list, so it's definitely one of my go-to books when I need inspiration.

    Today, with snow on the ground outside and more forecast for this evening, I was really in the mood for something warm and filling from my slow cooker, hence this bean bake.  With a bowl of bean and a roasted chicken breast on top it's the perfect meal for these cold evenings.  The only difference I made from the original recipe was to cook it longer than advised - I checked it at 3 hours (as the recipe stated), but found that the chick peas were still a little hard.


    Wholesome Tasty Bean Bake
    recipe book doesn't specify servings, but easily 6-8, so lots of leftovers for us :o)

    8 rashers bacon, diced
    2 medium onions, thinly sliced
    1 cup brown sugar
    1/2 cup white vinegar
    1 tsp salt
    1 tsp mustard powder
    1/2 tsp garlic powder
    1 can (14 oz) red kidney beans
    1 can (14 oz) pinto beans
    1 can (14 oz) lima beans (I used navy beans)
    1 can (14 oz) chick peas
    1 can baked beans in tomato sauce (undrained)

    • rinse and drain the: kidney, pinto, lima beans and chick peas, and combine in a 4-5 quart slow cooker.
    • in a medium saucepan saute the bacon pieces until crispy; drain on a paper towel covered plate and set aside.
    • in the same saucepan (no need to wipe out bacon drippings), saute the onions until tender.
    • add brown sugar, vinegar, salt, mustard and garlic powder; mix to combine.
    • add the cooked bacon bits, baked beans and the onion mixture to the drained beans in the slow cooker and combine well.
    • cover and cook on HIGH for about 4 to 4 1/2 hours.

     Tasty Bean Bake ingredients.

     combine all of the drained beans in your slow cookier.

    I find the easiest way to 'dice' bacon is to cut it with scissors directly over the pan.

    once you've sauted the onions, add the sugar, vinegar, salt, mustard power and garlic powder.

    add the baked beans and their juice and the onion mixture.

    after 4 1/2 hours it's a wonderful golden colour with a smoky, sweet flavour.

    I served in a large bowl with a roasted chicken breast, sliced and sprinkled with parsley.
    Delicious!!!

      Monday, November 22, 2010

      Coconut and Beef Curry with Noodles

      I'll be honest, I had absolutely no idea what we were going to have for dinner tonight.  First thing this morning I searched through the freezer and got out some frying steaks to defrost, but even looking at them I didn't really have any inspiration at the time.  Shall we have some Philly cheesesteaks - no.  How about some steak and blue cheese mini roulades - no (mainly because I don't have any blue cheese!!).  Dilemmas, dilemmas, dilemmas....

      ...after a search from front to back of the pantry and a browse through some cookbooks to give me some ideas, I decided on this curry.  Even though it would, I'm sure, taste wonderful if I had the inclination to mix up all the authentic spices and herbs, the easier and quite frankly just as delicious route is the use of the ready made curry paste that I found in the pantry.


      Coconut and Beef Curry with Noodles
      4 servings

      8 oz vermicelli (rice noodles) or angel-hair pasta
      2 Tbs vegetable oil
      1 lb beef frying steak, cut into thin strips
      1 red onion, halved lengthwise and thinly sliced
      2 bell peppers, thinly sliced
      1/4 cup water
      1 Tbs Thai red curry paste
      1 can (14 oz) unsweetened coconut milk
      1 Tbs lime juice
      • bring a large pot of water to a boil; add a generous amount of salt and cook the noodles until tender; drain.
      • meanwhile, in a large skillet, heat the vegetable oil over medium-high.  Season the beef and cook, turning, until browned on both sides, 4-5 minutes.  Transfer the beef to a plate and set aside.
      • add onion, peppers and the water to skillet; season with salt and pepper; cook, stirring occasionally until vegetables are crisp-tender, 3-4 minutes.
      • add the curry paste and cook, stirring, until paste is combined completely and fragrant, about 1-2 minutes.
      • return the beef and any accumulated juices to the skillet and add the coconut milk.
      • simmer until sauce thickens slightly, 4-5 minutes.
      • remove from heat and stir in the lime juice, and season with salt and pepper if required.
      • serve over the prepared noodles.

       Coconut and Beef Curry ingredients

      cut the beef into thin slices, and then fry off in the oil until browned.

      cut the vegetables fairly thinly, that way they don't need too long in the skillet.

       once you've fried the beef and set aside, saute the vegetables until crisp/tender - the hand belongs to my hubby - it's always a pleasure to have such a handsome helper :o)

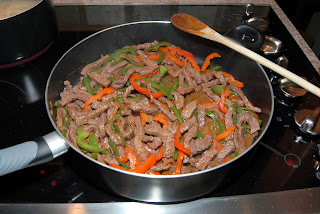
      fry the vegetables until crisp-tender, then add the curry paste - the smell at this stage is amazing.

      add the beef back into the skillet with it's juices.

      it might seem very 'liquidy' when you add the coconut milk, but within a couple of minutes it will thicken up nicely.

      I'm not a big drinker, but today our niece and her fiancee had their first little baby girl, so we opened a bottle of wine to celebrate :o)