Showing posts with label chocolate. Show all posts

Saturday, August 27, 2011

Chocolate Zucchini Loaf

One thing that I especially love about this time of year, apart from the warm afternoons lazing on the beach of course, is that a variety of things in our veggie garden are ready for harvesting.  It's been sort of a funny year to be honest, with a lot of cross pollination's going on, so I have weird cucumelons (cucumber / yellow melons) growing and although I have a lot of tomatoes they're taking their own sweet time ripening, but I'm sure it will all come out delicious in the end - it's just one of the fun thing about growing your own produce.

We've had a few carrots from the garden already, and the odd tomato and handful of strawberries but today was the day for the zucchini - and a perfect specimen it was too.  There's another one that's going to be ready any day now, which I'm going to make into some salad or side, but this one already had a reservation on it for some kind of zucchini bread or loaf - and lets be honest, chocolate just about goes with anything :o)


Chocolate Zucchini Loaf
makes 2 loaves

2 1/2 cups all-purpose flour
1/2 cup cocoa powder
1 tsp baking soda
1/2 tsp baking powder
1 tsp salt
1 1/2 cups sugar
3 large eggs
1 cup canola oil
2 tsp vanilla extract
2 cups (packed) zucchini, grated unpeeled
1 cup chocolate chips

  • preheat the oven to 350 degrees F, and line two 9"x5" loaf tins with wax paper.
  • in a large bowl mix together the flour, cocoa, baking soda, baking powder and salt;  set aside.
  • in another large bowl whisk the sugar and eggs together until light and fluffy.
  • to the egg mixture add the canola oil and vanilla extract;  mix well.
  • add the wet mixture to the dry ingredients, along with the zucchini and chocolate chips.
  • mix until just combined and then divide the mixture between the two prepared loaf tins.
  • bake, in the centre of the oven, for 50-60 minutes until the top is cracked and spongy.

 Chocolate Zucchini Loaf ingredients.

line two loaf tins with wax paper.

grate the zucchini until....

....you have a bowlful of greeny goodness.

mix together the flour, cocoa, baking soda, baking powder and salt.

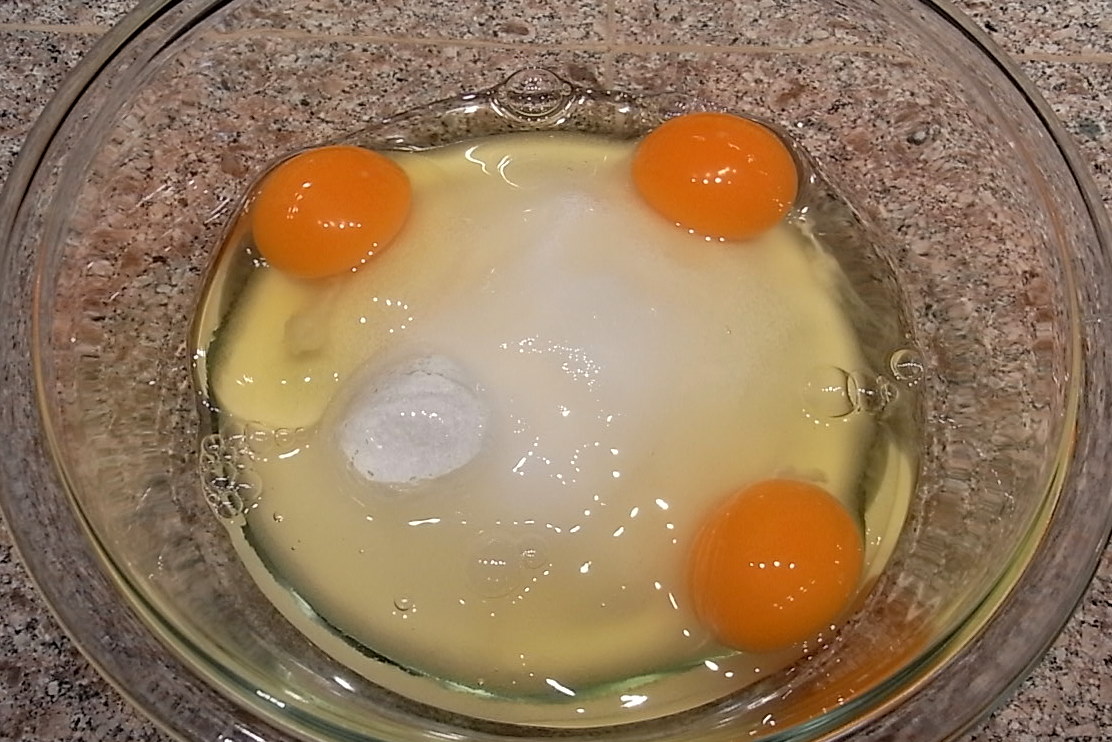
put the sugar and eggs into a large bowl and....

....whisk like mad until light and fluffy - of course you could also use an electric hand mixer or even a stand mixer, but my arms needed the workout :o)

add the oil and vanilla and mix well.

add the wet mixture to the dry along with the zucchini and chocolate chips, and...

...mix until just combined.

divide the mixture evenly between the two loaf tins.

bake until the tops are cracked - these took about 52 minutes.

if you're like me and can't wait until the loaves have cooled down completely you're first slice will be studded with these melty little chocolate 'spots' - yummy!!!


Tuesday, June 28, 2011

Mini Birthday Cake

Happy Birthday Alana :o)

I wanted to bake something for my friend's birthday today, and I debated back and forth for quite a while at what to make.  It was between a fruit tart, or a cheesecake, or maybe even some confectionery, but in the end I found this recipe for a mini individual Italian sponge cake (a Genoise) in this wonderful book that I bought a while back from a used book store.  It's a very light and airy cake that works perfectly because of the small size.  I covered it in a simple ganache, and decorated with white chocolate flowers, but the 'Happy Birthday' that I had planned to pipe onto the top didn't make it - my piping skills have to be practiced a little more - I barely managed her name on the plate (and that even took a couple of tries which were wiped off!!! :o)


Mini Birthday Cake
4 inch diam.

2 Tbs unsalted butter, plus more for greasing cake pans
1/3 cup all-purpose flour, sifted, plus more for flouring the cake pans
1/4 cup sugar
2 tsp hot tap water
1 large egg, at room temp
1 large egg yolk, at room temp
1/4 tsp vanilla extract
pinch of salt

Ganache
1/4 cup plus 2 Tbs whipping cream
5 oz dark bittersweet chocolate chips

Chocolate flowers
1/2 cup white chocolate chips
dark chocolate chips (to make centre of flowers)

  • preheat the oven to 350 degrees.
  • butter and flour the bottom of two, four inch diam mini cake pans (I bought these from a local kitchen supply store, but they shouldn't be too difficult to find)
  • place the butter in a small microwave-safe bowl and microwave until the butter melts, 30-40 seconds.  Set aside to cool.
  • warm a small bowl by letting hot tap water run into and over the bowl.  Dry the bowl thoroughly and add the sugar.
  • stir in the 2 teaspoons of hot tap water until all the sugar is covered.
  • add the egg and egg yolk, and using a hand-help electric mixer, beat on high speed until the mixture is thick and pale in colour, about 5 minutes (when you lift the beaters a 'ribbon' of batter should sit on the top for a second before sinking in.)
  • gently fold the vanilla extract into the egg mixture.
  • sift the flour and salt over the top and using a whisk, gently fold into the mixture until incorporated.
  • whisk 3 tablespoons of the batter into the melted butter, then gently fold back into the main batter until just blended.
  • spoon the batter evenly between the cake pans and place onto a baking sheet, for easier handling.
  • bake until the centers are springy and the sides are beginning to pull away from the pans, about 15 minutes.
  • remove the pans from the oven, and immediately run the tip of a sharp knife around the edge of each cake (this will stop the crust from sticking to the top edge of the pan as it cools and shrinks).
  • let them cool, still in the pans, for 10 minutes on a wire rack.
  • carefully remove them from the pans and let them cool completely on the rack.
  • meanwhile you can make the ganache.
  • pour the whipping cream into a small saucepan and bring to a boil over medium-high heat.
  • immediately remove the pan from the heat and add the chocolate chips, swirling the pan to submerge the chocolate in the hot cream.
  • let the mixture stand until the chocolate softens, about 1 minute, then stir with a whisk until the chocolate is melted and the mixture is smooth.
  • allow it to cool for about 1 hour, then use immediately.
  • while you're waiting for the ganache to cool you can make the chocolate flowers.
  • place the white chocolate chips into a small microwaveable dish and microwave in 20 second increments until melted;  set aside for a couple of minutes until it's cool enough to handle.
  • if you have a small tipped piping bag you can use that, or as I did (a piping kit is on my 'to get' list) you can roll a piece of wax paper into a cone and cut a small hole in the tip.
  • spoon in the melted chocolate and roll down the top to close it and make handling easier.
  • onto a piece of wax paper pipe the outline of your flowers and then go back and fill in each petal with more chocolate.
  • press one dark chocolate chip into the centre of each flower and place the sheet into the freezer until the chocolate is set;  is should only take about 10 minutes.
  • by now the cakes and ganache should be cool enough to assemble.
  • put about a tablespoon of the ganache on the top of one cake and spread to the edges;  place the other cake on the top to make two layers.
  • gently pour the rest of the ganache over the top of the cake and using a knife or small spatula spread it across the top and down the sides to cover the sponge completely. (for easy cleanup I kept the cake on the wire rack with a piece of wax paper underneath to catch any drips.
  • using a clean spatula, very gently lift the cake and place it on a serving plate.
  • while the ganache is still soft, gently press the hardened flowers into the top of the cake and place the whole thing into the fridge until you're ready to serve.

 Mini Birthday Cake ingredients.

butter and flour two, 4 inch cake pans.

place the sugar into a warm bowl and add 2 teaspoons of hot tap water.

add the egg and egg yolk.

with a hand held electric whisk, beat until....

lightened in colour, about 5 minutes.

sift the flour and salt into the egg mixture and gently blend.

add 3 tablespoons of the batter to the melted butter, whisk and then add back to the main batter and mix gently until blended.

pour into the prepared cake pans and bake.

run a sharp knife around the edges so they don't stick and cool in the pans for 10 minutes, before removing from the pans to cool completely.  Meanwhile....

 Ganache ingredients.

pour the whipping cream into a small saucepan....

and bring to a boil.

add the chocolate chips and swirl to cover with the hot cream; leave for 1 minute for the chocolate to soften, then...
whisk, until....

blended and smooth.
Now for the flowers...

melt the white chocolate chips in the microwave in 20 second increments, and make a small piping bag out of wax paper (unless you have a small one already).

on a piece of wax paper, pipe the outline of the flowers, going back and filling in the petals with more chocolate;  gently press a dark chocolate chip into the centre to complete the flowers.  Pop into the freezer to harden for 10 minutes.

spread about a tablespoon of cooled ganache onto the top of one cake and sandwich together with the other.

pour over the remaining ganache and using a knife or small spatula spread it around the top and down the sides to cover the sponge cake.

carefully transfer the cake to a serving plate using a clean spatula and gently press in the flowers to the soft ganache;  if you're feeling creative you can pipe names or messages directly onto the plate - at least this way (as happened with me) if you make mistakes it's easier to wipe off and try again than it is if you pipe onto the cake!! :o)

Saturday, May 28, 2011

'Mug' Chocolate Cake

Most of us like (or love!) chocolate cake, but unless it's a special occasion, if you're anything like me it doesn't get made very often - you might make the odd batch of chocolate cupcakes to appease your chocolate cake hormonal gods, but that's about it.

Well now you can have your chocolate cake and eat it, every day if you want!!
I came across this recipe in a new cookbook that I bought recently and wanted to try it because basically I didn't believe that it would work or that it would be any good - well, I couldn't of been more wrong.  If you're looking for a fast, last minute, warm, moist, delicious chocolate cake then look no further. You may be as sceptical as I was when you read it, but go on, give it a try and you'll be thanking me, I promise :o)

I have some large Christmas mugs that I use, and quite honestly just making one is enough for hubby and I with a couple of scoops of vanilla ice-cream for dessert.  I usually make it and eat it while it's still warm, but we had a couple with friends a few weeks ago and they're just as nice once they've cooled down.


'Mug' Chocolate Cake
makes 1 'large mug' cake

1/4 cup all-purpose flour
5 Tbs sugar
2 Tbs cocoa powder
1 large egg
3 Tbs milk
3 Tbs vegetable oil
1/4 tsp vanilla extract
pinch of salt
  • whisk everything together in a large mug until smooth.
  • microwave on full power for about 2 minutes until puffed (1 min, 50 seconds is good for my microwave)
  • either eat straight from the mug, or tip out and enjoy with vanilla ice cream.  
  • if you want a little bit of molten 'sauce' on top of the cake when you tip it out, reduce the cooking time by a couple of seconds.
 'Mug' Chocolate Cake ingredients.

put everything into a large mug and whisk....

...until smooth.

microwave for about 2 minutes until puffed.

tip out and if you've got the timing right you'll have a delicious molten 'sauce'.

we find that just one 'mug' serving is enough for two people alongside some good vanilla ice-cream.

Sunday, May 8, 2011

Chocolate Finger Tips

After Friday's chocolate covered strawberries I only had about 1/2 cup of chocolate chips left in my jar, so I decided that today was also going to be a chocolate 'dipping' day - who can resist ANYTHING dipped in chocolate :o)

I didn't bother using my stand mixer for this because it's not a huge amount of dough, so just a little elbow grease and a wooden spoon worked fine.


Chocolate Finger Tips
makes 15 fingers

1/2 cup butter, soft room temperature
3 Tbs icing sugar
1 1/4 cups all-purpose flour
1/8 tsp vanilla extract
1/2 cup chocolate chips

  • preheat the oven to 350 degrees F.
  • put the softened butter into a medium bowl and sift the icing sugar over the top.
  • using a wooden spoon cream them together until very soft.
  • mix in the flour and vanilla extract until combined - it will come together as large 'clumps' which you can then press together with you hands to form a ball of dough.
  • pinching off pieces of dough about the size of a walnut, roll them in your hands to form small logs about 3 inches in length - I pressed them against my fingers to form little indents (as the photo shows), but keeping them as round logs will work just as well.
  • place them on a cookie sheet a couple of inches apart and bake for 15-17 minutes, until edges are just browning.
  • leave to cool on the cookie sheet for a couple of minutes before transferring to a wire rack to cool completely.
  • once the cookies are cooled, melt the chocolate in a microwavable bowl in 10 second increments until nearly smooth;  whisk to melt completely.
  • place a piece of wax paper over a wire rack ready to hold the chocolate dipped 'fingers'.
  • carefully dip each end of a cookie in the melted chocolate and place on the wax papered rack;  repeat with the remaining cookies and then place in the fridge to set completely.

 Chocolate Finger Tips ingredients

put the butter into a bowl and sift the icing sugar over it.

cream together until softened and smooth.

add the flour and vanilla extract.

blend everything together until you have large clumps;  you can then press together to form a soft dough ball.

make 'logs' using about a walnut size piece of dough (I squeezed them a little to form dents, but you can keep them plain 'logs' if you prefer).

place them on a cookie sheet and bake until the edges are just browning.

once they're cooled completely, carefully dip each end in the melted chocolate.

place them on a wax paper covered wire rack and pop them in the fridge to set completely.

 a line of chocolately, biscuity yumminess!! :o)