Showing posts with label lunch. Show all posts

Wednesday, August 24, 2011

Chili Dogs (or in our case 'Billy' Dogs)

If you're anything like us, during the summer months when the BBQ is front and centre in the garden, most days you'll have some form of hot dog or smokie in your fridge.  Oh, I know that there's probably also other things like steaks and salmon and chicken and burgers....you get the picture, but hot dogs just seem to be the one thing that's always there. 

With that in mind, what better way is there to use up the last two hot dog buns in the pantry than to make chili dogs - or in this case 'Billy' dogs because I used some of our Billy Beans instead of chili - and even though these can quite easily be baked enclosed in your BBQ, for a quick lunch it's just as easy to pop them in the oven.  I've given you an idea of what condiments and flavours went into ours but with this kind of thing the skies the limit on what you want to pack in there - I would of added some chopped onion, only I didn't have any, and of course ketchup or pickles or anything else that gets your taste buds tingling would be delicious. 


Chili 'Billy' Dogs
yields as many as you want to make :o)

hot dog buns
hot dogs or smokies (today I used all-beef dogs)
relish
honey mustard
chili or Billy Beans
grated cheese

  • preheat the oven to 400 degrees F.
  • line a high sided baking tray with aluminum foil and set aside - you want the hot dogs to be packed in together fairly tightly, so I find a standard loaf tin is good for 2, and an 8"x8" pan works good for 4, but use whatever you have.
  • into each hot dog bun spread the relish and honey mustard, or whatever condiments you are using.
  • drop in your hot dogs and carefully pack them into your prepared baking tray.
  • spoon over as much chili (beans) as you want and sprinkle grated cheese over the top.
  • cover the tray with aluminum foil and bake in the oven for 20-25 minutes until the cheese has melted and it's all heated through.
  • carefully remove them from the tray and enjoy!!  All the flavours meld together in the oven and the bun is warm and soft in the middle but with a crispy exterior - delicious!!

 Chili 'Billy' Dogs ingredients.

line a baking tray with foil.

spread whatever condiments you're using into your hot dog buns....

...and pop in your hot dogs.

gently squeeze them into your prepared tray and cover with...

...chili (beans) and...

...cheese.

cover them with foil and bake until heated through and the cheese has melted - mmmmm.

soft and warm bread on the inside and crusty exterior - delicious!!


Sunday, January 2, 2011

Corned Beef and Cheese Pasties

We've all got that certain something that we go to when we need a little pick-me-up.  That comfort food that satisfies whatever it is you're craving at any particular moment.  Whether that's an actual craving for the food or for the feelings and memories that the food itself evokes.  If you're anything like me, you've also got more than one 'comfort food' that you go to....my Mum's roast potatoes; my late Nan's turkey gravy (I never took enough notice as a child to know exactly what she put in it, but I've never been able to replicate it, and unless she decides to send it to me in a dream, I'm never going to get it!!! :o); a bag of rainbow sherbet - childhood memories of purple fingers.....and then there are these little artery clogging beauties.

They're not for the faint hearted, that's for sure.  With the amount of cheese and buttery puff pastry in each one they are definitely only for rare and special occasions.  The very simple recipe originally comes from the landlady (Yvonne) of a small country pub that we used to go to regularly back in England.  After a lunch of pasties and beer it's a wonder any of us made it home without bursting....ahhhh, very fond memories :o)


Corned Beef and Cheese Pasties
makes 9 (4 inch diam) pasties - with some leftover filling

2 cans corned beef
1 1/2 cups grated cheese (I used some leftover 'nacho' mix, but try anything you have)
1 package (397g) frozen puff pastry, thawed
1 egg

  • preheat the oven to 375 F.
  • open the cans of corned beef and put them into a large bowl; mince with a fork until broken up well.
  • add the grated cheese and mix well.
  • on a floured surface roll out the puff pastry to about 1/8 inch thickness and using a 4 inch cookie cutter or whatever you have, cut out 18 discs.  You can make these pasties smaller or larger depending on how many you want, so adjust the cutter size accordingly.
  • crack the egg into a small bowl, add a splash of water and beat until slightly frothy, for an egg wash.
  • assemble the pasties by placing one pastry disc on a flat surface, ball up some corned beef mixture to about the size of a golf ball and place in the centre of the pastry disc, flattening it slightly, leaving a 1/2 inch ring of pastry showing.
  • brush the exposed ring of pastry with egg wash before placing the top piece of pastry.
  • take a second pastry disc and stretching it slightly as you work, place it on top and mold it around the filling.
  • using a fork press down the edges to seal them, pierce a couple of holes in the top of each pasty and place them onto an ungreased baking sheet.
  • once you've assembled all of the pasties, brush them thoroughly with egg wash and bake in the oven for 15-20 minutes depending on size.
  • let them cool slightly before eating as the filling can get very hot.  These are also delicious cold.

 Corned Beef and Cheese Pasties ingredients.

mince the 2 cans of corned beef until broken up well.

add the grated cheese and mix well.

the puff pastry that I used came in two of these blocks in the package.

roll each block out to about 1/8 inch thickness.

cut out using whatever size cutter you want - I used a 4 inch one.

I managed to get 18 discs, so 9 pasties.

make up your egg wash.

leave a ring of pastry around the filling and brush with egg wash.

stretching it slightly place the second pastry disc over the mixture and seal by pressing the edges with a fork.

place all the pasties on an ungreased baking sheet and brush thoroughly with egg wash before baking.

bake for about 15-20 minutes until golden brown and puffed.

flaky and gooey and cheesy and.....oh my!!!!

    Saturday, December 18, 2010

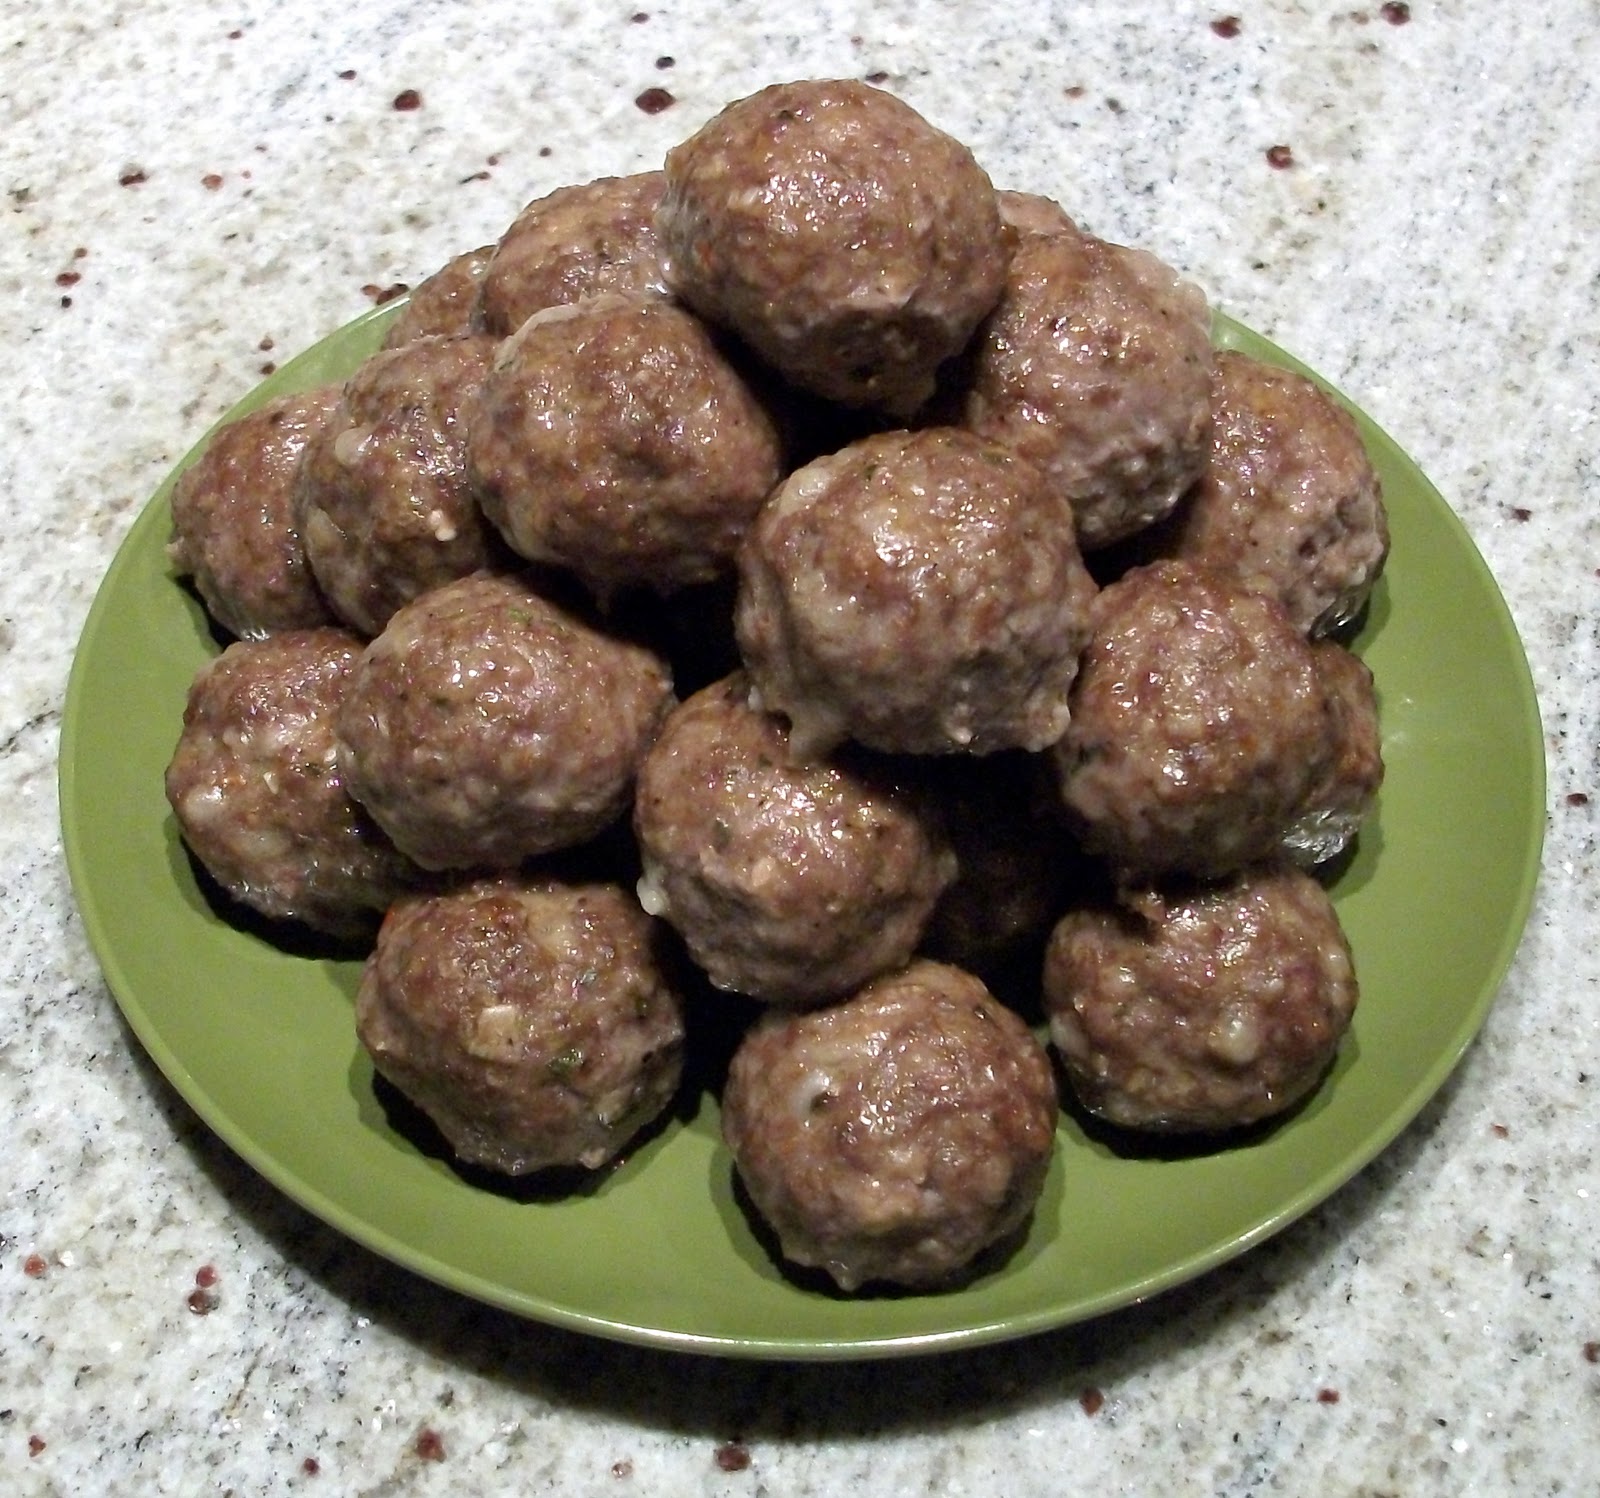
    Spicy Mini Meatballs

    I LOVE MEATBALLS!!!!
    There, I've said it.  I just wanted that to be out in the open and for you all to hear it from me first - I love them hot, cold, baked, bubbling in marinara sauce, over pasta, in a sub....hey, slap them on a flip flop and I'd still probably eat them (thanks Guy Fieri for that analogy :)

    Whenever I make my own meatballs I tend to have a basic ingredients list and then I get to the spices and stand for about 10 minutes in front of my spice rack (i.e. a large Tupperware container in the pantry) to decide which way I want to take them; italian seasoning for that subtle aromatic flavour, mesquite for a more smoky hint, maybe cajun for that spicy 'slap'.  Today, after enlisting the opinion of my hubby by thrusting various tubs under his nose and asking "what do you want your meatballs to taste like?", we went with the cajun and a huge hit it was too, if I do say so myself.  This mix would also make great meatloaf or even burgers - maybe mini sliders!! :o)


    Spicy Mini Meatballs
    makes 80-90 mini meatballs (1-1 1/2 inch diam)

    1 kg  ground beef
    3/4 cup quick cook oats
    1 cup milk
    1/2 cup parmesan cheese, grated
    2 tsp worcestershire sauce
    1 Tbs cajun seasoning
    1 tsp garlic powder
    1 tsp onion powder
    2 tsp dried parsley
    1 1/2 tsp salt
    1/2 tsp pepper

    • line a couple of rimmed baking trays with wax paper and set aside.
    • in a large bowl combine ALL the ingredients and with clean hands mix thoroughly until it resembles an almost pate consistency.
    • form the mixture into 1-1 1/2 inch diam balls (the size of a small walnut), and place on the prepared baking tray.
    • at this stage you can freeze the meatballs on their trays, and once frozen pack in ziploc bags in individual or 2 person servings for future meals.
    • to cook, defrost and either pan fry in a little oil or, as I like to do, place in a baking dish and bake at 400 F for 15-20 minutes, until cooked through but still moist.
    • these can be eating as bite size appetizers on toothpicks, mixed with marinara sauce over pasta, or as we had them for lunch today as open-faced meatball subs.

    Spicy Mini Meatball ingredients - oops, it wasn't until after I'd downloaded my photos that I realised I hadn't included the main ingredient in this shot - the ground beef!!!

    begin throwing everything in one big bowl - don't you just love recipes like that? :)

    you can mix it all together using a spoon if you really don't like to get your hands all gooey.

    when it's at an almost pate stage it's ready to form.

    pinch off a little mixture and roll between your palms to make 'balls'.

    place them all onto the prepared trays ready to either cook or freeze - I managed to get 88 out of today's batch and don't they look adorable :)

    yummy, cajun goodness!!!!

      Friday, December 3, 2010

      Simple Marinara Sauce

      There are so many wonderful pasta sauces out there on the market, that sometimes it's so much easier to just grab a jar off the grocery store shelf and go with that along with your favourite pasta.  I do it that way most of the time to be honest, but today I decided to make my own marinara sauce - it's a lot cheaper to begin with, especially because if you make quite a large quantity, as this recipe is, it freezes beautifully so there's another couple of meals right there.  Also, you can get the taste exactly to your own personal preference. This is what went into mine today, only because I had everything on hand - another time, it might change slightly with subtractions and additions, but that's what I like about it.  It's a very versatile, simple sauce.


      Simple Marinara Sauce

      1 Tbs olive oil
      1 onion, diced
      5 garlic cloves, minced
      2 tsp italian seasoning
      3 (14oz) cans diced tomatoes in juices
      2 (14oz) cans crushed tomatoes
      1 Tbs dried parsley
      1 Tbs dried basil
      1 tsp garlic powder
      1 tsp onion powder
      1/2 cup parmesan cheese
      salt and pepper

      • saute, over medium heat, the onions in the olive oil until soft, about 5-7 minutes.
      • add the garlic and italian seasoning and saute for another 1 minute.
      • add all the cans of tomatoes and mix well.
      • add parsley, basil, garlic powder and onion powder; mix well and heat until bubbling.
      • include the parmesan cheese and stir until melted.
      • turn heat down and simmer for 1 - 1 1/2 hours.
      • taste and adjust seasoning if required.
      • when it's finished simmering, if desired, puree the sauce with an immersion blender until smooth.

       Marinara Sauce ingredients (most of them anyway - the rest is just off camera - I'm a bit of a 'space cadet' today!!! :)

      mince the garlic and chop the onions fairly small.

      saute the onions until soft.

      add the garlic and italian seasoning for just a minute until fragrant.

      add in the other herbs and powders.

      after an hour or more of simmering the sauce thickens into rich awesomeness.

      tonight we had the sauce with some pre-bought ravioli.

      delicious - and lots more in the freezer for future meals.

      Monday, November 29, 2010

      Chicken Casserole with Biscuits

      Everyone should have at least one recipe in their repertoire that requires the absolute minimum of preparation, using ingredients that will probably already be in your fridge, freezer or pantry.  Just for those days when the least amount of effort for a huge and tasty payoff is required.  This one is even cooked in the slow cooker, so even better.

      This is mine.....
      (By all means, if you have the time or inclination, please, please make your own biscuit dough for the topping, but I'm more than happy with using those tube biscuits - like I said, 'minimum preparation'!! :o)


      Chicken Casserole with Biscuits
      6 servings

      6 skinless, boneless chicken breasts
      2 Tbs butter, softened
      1 onion, sliced
      1 can condensed chicken soup
      1 can condensed mushroom soup
      1-2 tbs dried garlic (or 1-2 cloves, chopped - but that was just too much effort today :o)
      2 Tbs chicken seasoning
      pinch salt & pepper
      vegetable stock
      1 tube refrigerator biscuits

      • in a 4-6 quart slow cooker, combine the chicken breasts, butter, onion, soups, garlic, chicken seasoning and salt and pepper; pour in enough vegetable stock to almost cover the chicken, and mix well.
      • cover and cook on LOW heat for 4 hours.
      • remove the chicken breasts and chop into bite size pieces; return to the slow cooker and mix well, check the seasoning and add more salt and pepper if needed.
      • break each biscuit in half and arrange across the top of the casserole, sinking them into the sauce slightly.
      • turn the heat to HIGH, and cook for a further 1.5 - 2 hours, until the biscuits are puffed up and golden.

       Chicken Casserole with Biscuits ingredients.

      this is about the hardest of the prep work that you'll have, apart from opening a few cans ;o)

      I just love the concept of throwing everything in the slow cooker and leaving it to do it's own thing - ingenious!

      mix everything up well.

      I didn't even use a knife to cut the chicken, just the spoon that I was going to mix it back into the sauce with - it's soooo tender.

      I always jump at the 'pop' as the tube explodes open - I usually expect them to fly across the room!!

      tear the biscuits in half and submerge them slightly in the sauce.  Don't worry if you think the sauce is a little too 'liquidy' at this stage - the biscuits will soak some of that up as they bake.

      the biscuits puff together and are wonderfully moist.

      if, like today, I wanted as little work as possible I make ours pretty basic, but on occasion I'll add some frozen vegetables (peas, corn, green beans - whatever's handy) just before I put the biscuit topping on and it's delicious that way too.